In an internet-driven world, you need a recognizable and memorable domain name and a responsive, user-friendly website to get ahead of the curve. These elements are the foundation of your digital business.
Since your total website traffic depends on your online visibility, you should aim to host a website that can give you the traffic you need to take your lead generation, conversion, and retention rates sky-high.
Google Cloud is the best solution for hosting a high-traffic website without breaking your budget. This Google Cloud web hosting tutorial will help you learn about everything you need to host your website on Google Cloud, including how to do it.
So, let’s get down to business.
What you need to do to host your website on Google Cloud
The Google Cloud web hosting service lets you put your website on a digital platform through an affordable subscription. You rent a virtual server to host your website on Google Cloud, thus getting access to all the perks of cloud hosting.
Google Cloud offers numerous solutions for hosting your website and business-related applications in the cloud. You can also get ultra-secure data storage for storing your business data and web content.
Thanks to the cloud, you can easily access, share, and distribute your online business assets according to your needs without worrying about cyber threats, hack attacks, data loss, etc. More importantly, the cloud scales with your business operations without additional resources.
With that in mind, here’s a list of everything you’ll need to host your website on Google Cloud:
- Google account;
- A domain (you must be its administrator or owner);
- A CNAME record;
- A storage bucket;
- Uploaded website data to the cloud;
- Access permission;
- Website configuration for the cloud.
How to host your site on Google Cloud in 5 steps
Here is a detailed tutorial to help you set up Google Cloud web hosting for your website.
Step #1. Create a CNAME
CNAME record (Canonical Name Record or Alias Record ) is one of the critical systems, along with Domain Name Services (DNS), required for websites to work on the web. DNS translates website names into IP addresses of web servers hosting those websites.
There’s a section within DNS dedicated to adding RECORDs to the DNS entry. This section ensures every website has the required web configuration to operate correctly in the cloud. That’s where you’ll create your CNAME to ensure that the web leads users to your website when they type in its name without the “www.”
Here’s how to do it.
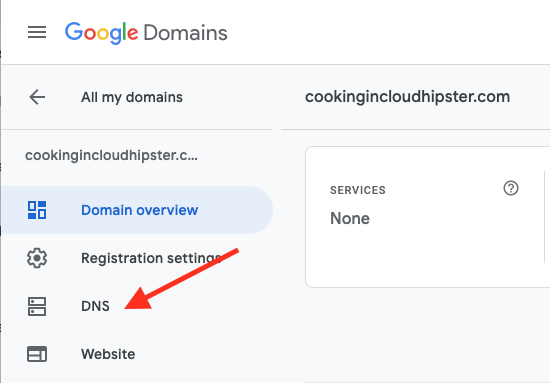
Step 1: Navigate to Google Domains.
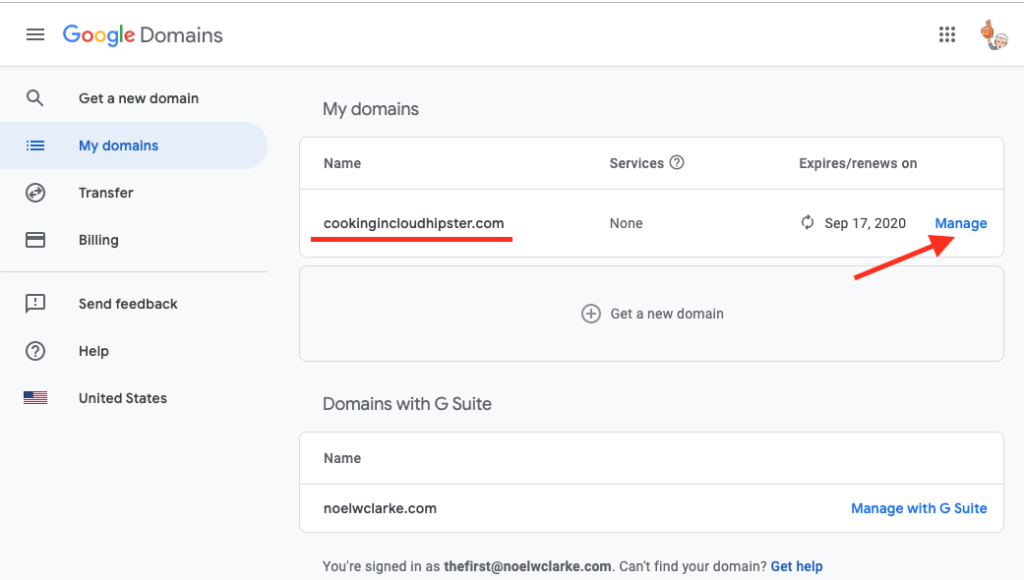
Follow this path: Google Domains > My domains > Manage > DNS.
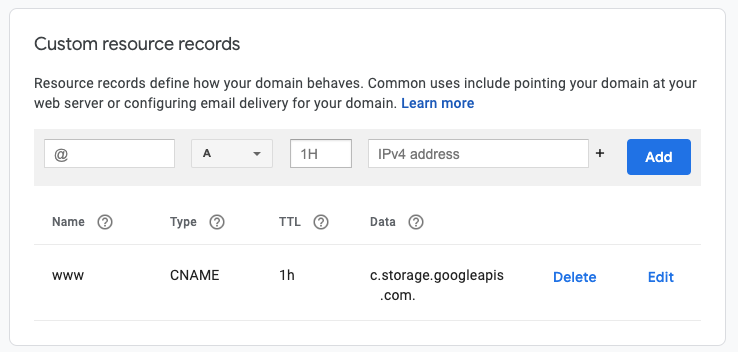
Step 2: Select Custom resource records.
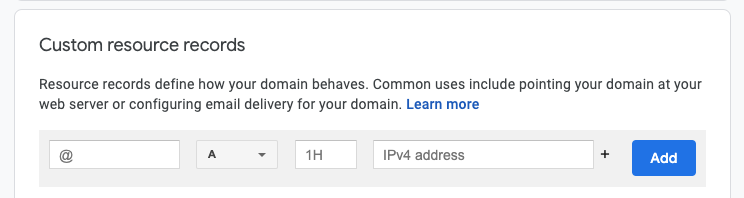
In the DNS Settings tab, click Custom resource records and add your CNAME record. If everything is in order, you should see this window:
Step #2. Create your storage bucket
The next step is to create your storage bucket to store your static website data.
Step 1: Open the Cloud Console.

Navigate to the Storage panel in the Cloud Console and follow this path: Storage > Storage task > Create bucket.
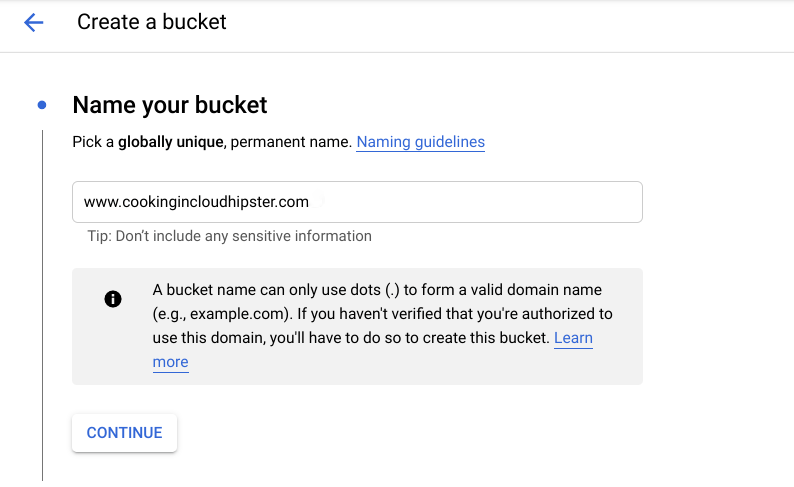
Step 2: Choose your bucket settings.
Fill out the necessary fields:
- Name your bucket — use your website name to name your bucket;
- Select data storage — opt for the Multi-region option to make your data widely available;
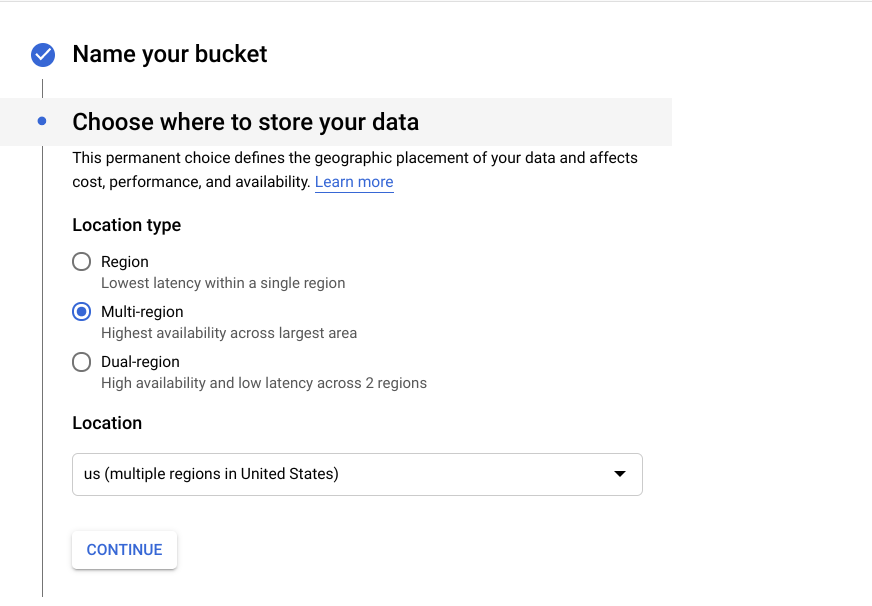
- Classify your data storage — choose the Standard storage class;
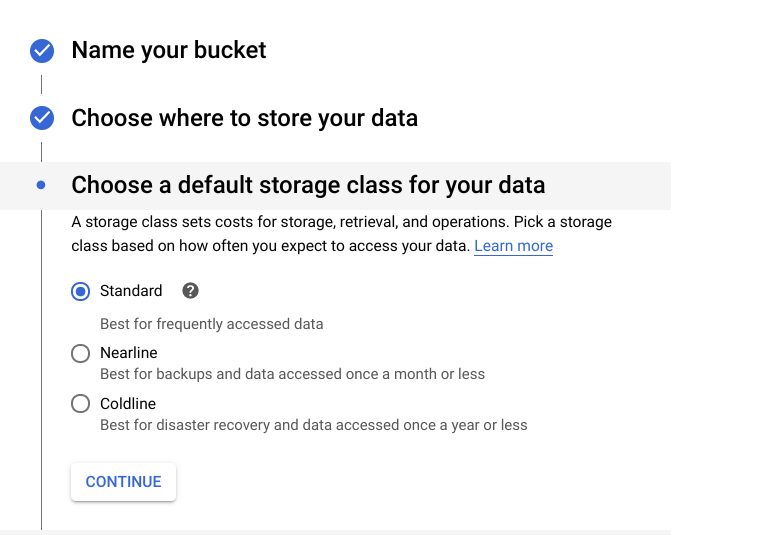
- Select object control access — select your Access control model by clicking Set permissions uniformly at bucket-level (Bucket-Policy Only).
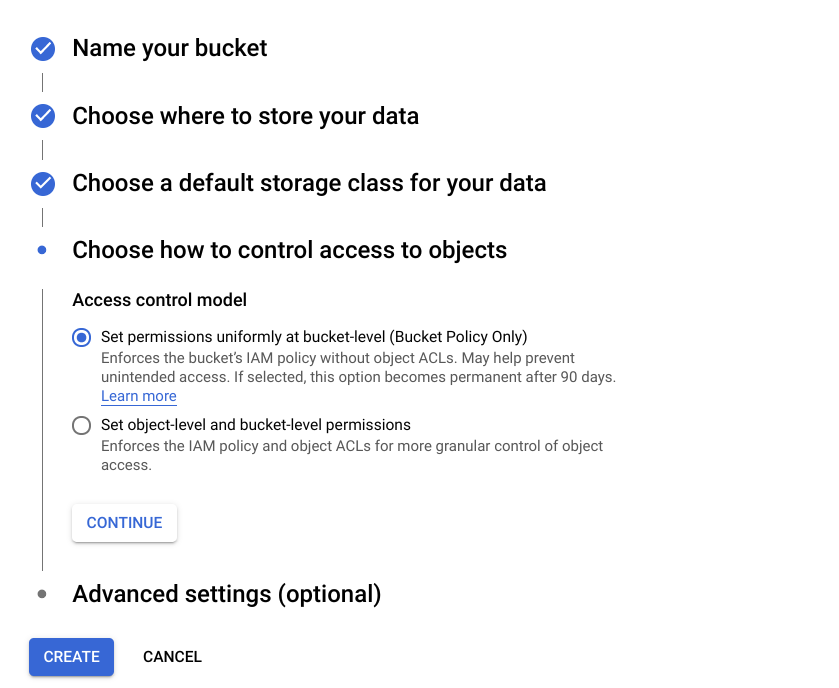
Click Create to complete the process.
Step #3. Upload website data
Before uploading your website data to Google Cloud, you must acquire the static data from your marketing staff or website developer. Once you obtain the static files, upload them into your storage bucket by following these steps.
Step 1: Open the Cloud Console.

Go to Google Cloud Platform > Cloud Console > Storage > Browser.
Step 2: Select the bucket name.

Select your bucket name to open the Bucket details tab and click Upload folder.
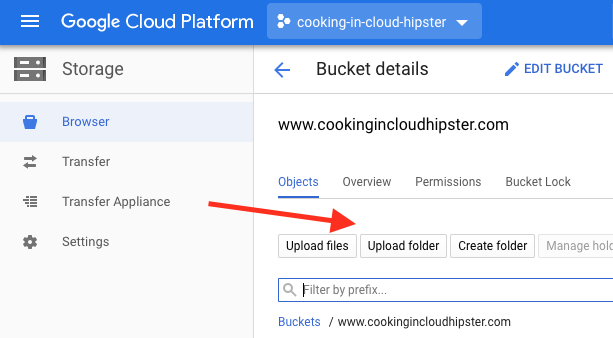
Step 3: Upload your data.
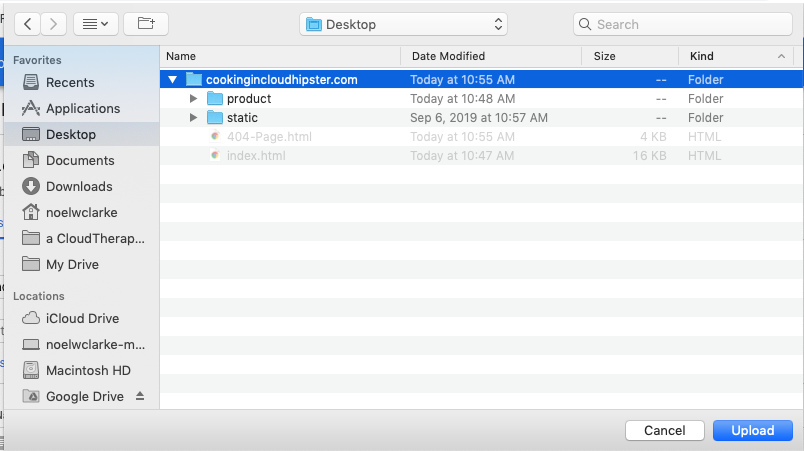
Select the website’s files and folders you want to move to Google Cloud and click Upload.
Step #4. Add access permission
Adding access permission allows you to apply bucket-level permission to your entire bucket. Here’s how.
Adding access permission allows you to apply bucket-level permission to your entire bucket. Here’s how.
Step 1: Add permissions.
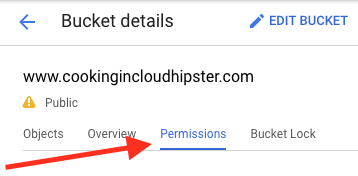
Open the Cloud Console and follow this path: Google Cloud Platform > Cloud Console > Storage > Browser > Bucket name > Bucket details > Permissions.
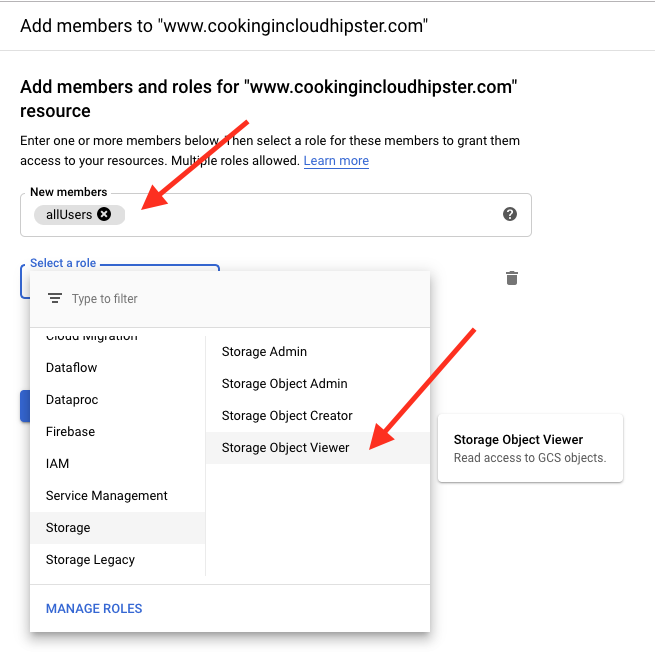
Step 2: c.

In the Permissions tab, click Add members, and select allUsers with Storage Object Viewer access.
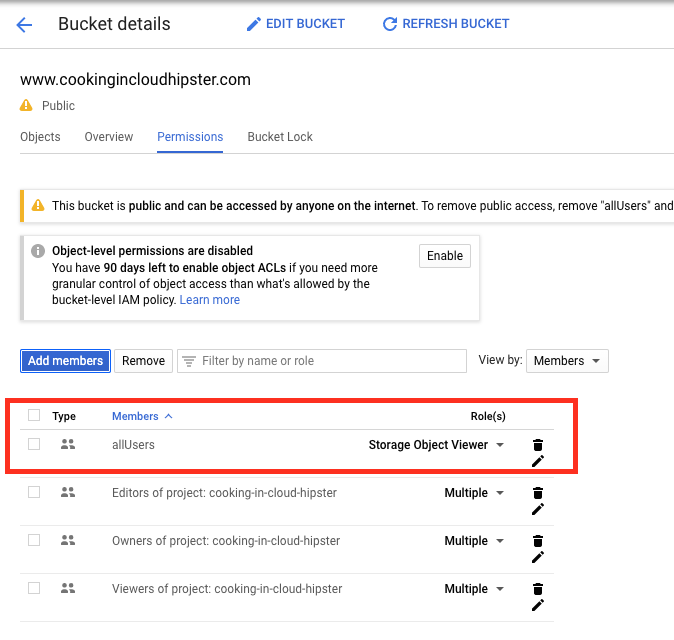
If your actions were successful, you should see this window:
Step #5. Configure the website
Finally, we come to the last step — configuring your website for the cloud. There are two pages you must configure:
Index page — assign an index page suffix (MainPageSuffix property);
Error page — assign an error page suffix (NotFoundPage property).
An index page or webserver directory index is the file internet users see when they type in a URL that doesn’t have an associated file. When you assign an index page, Google Cloud fetches a matching file and a URL with the matching prefix.
The error page is a web page visitors see when they enter a URL that doesn’t match an existing file on your website. The most common HTTP response to an error page is the 404 code (not found).
Here’s how to configure your website:
Step 1: Locate the Edit website configuration option.
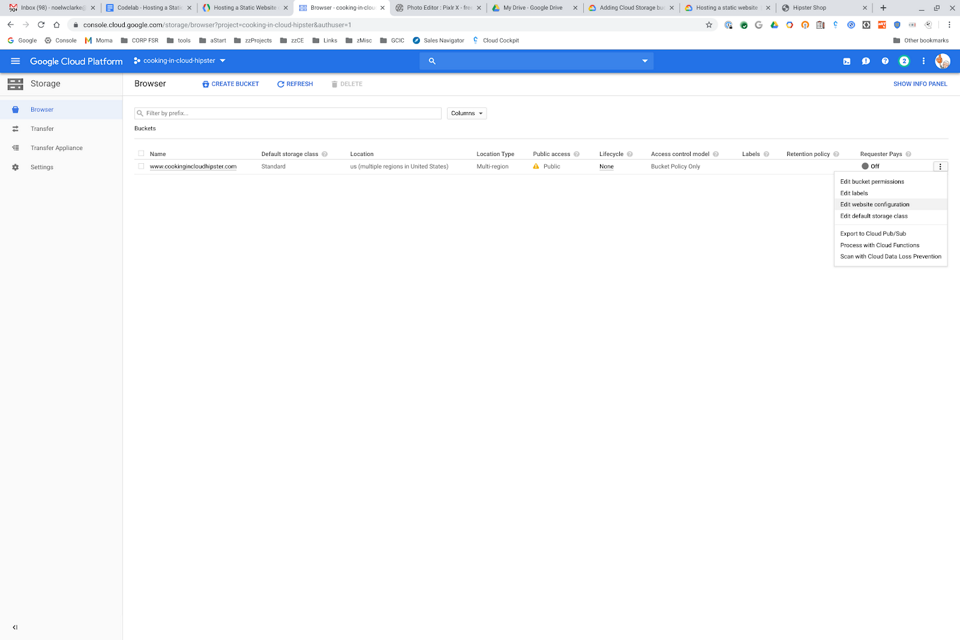
Navigate to Google Cloud Platform > Cloud Console > Browser. In the Browser section, locate the Settings (three dots) menu and select Edit website configuration.
Step 2: Set index and error page settings.
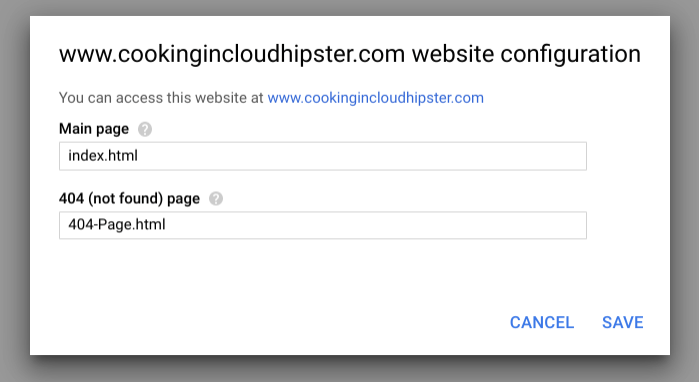
In the Main page field, enter index.html. In the 404 (not found) page field, enter 404-Page.html.
That’s it; your website is ready for Google Cloud web hosting.
Conclusion
This Google Cloud web hosting tutorial should help you prepare your website for migration to the cloud environment. Aside from being the world’s most extensive, leading search engine, Google is one of the best cloud service providers on the net.
Since moving your digital business to the cloud brings numerous advantages, such as increased data security and more scalable and flexible operational capability, your online business will benefit significantly from Google Cloud web hosting.
(Images source: Codelabs.developers.google.com)