When you start a WordPress blog, and especially if this is the first one you have worked with, finding the right WordPress theme may take time. And that’s something completely natural. Just like finding new furniture or deciding on a new hairstyle, it will take time until you stumble upon that perfect theme that’s going to stay active on your site.
During that process, you will probably install several different themes to try them out. And if you choose to purchase a premium one, you still need to know how to install it to your WordPress site before users can enjoy its design.
Installing a new WordPress theme is fairly straightforward. But since there are three different methods you can use, why not learn them all now? Once you try all the techniques, you will never have problems with installing new themes in the future.
Since it will take just a few minutes to install a theme, you can try any of the methods right now.
Use WordPress theme search feature
The quickest way of installing free WordPress themes from the official directory is to use the inbuilt search function.
- From the admin dashboard menu, choose Appearance -> Themes
- On top of the page, click “Add New” button
On this page, WordPress will display fifteen featured themes from its repository. From this point, you can start looking for a theme that you like.
Every theme is presented in a feature box on its own. From the top bar, you can switch the view to the most popular, latest or favorite themes. Favorites tab will be empty until you mark at least one item on WordPress.org pages. By clicking on the “Feature Filter” button, WordPress will show you items by the filter that you select:
- Layout – grid, one column, left side, etc.
- Features – flexible-header, custom background, full-width, etc.
- Subject – holiday, news, photography, etc.
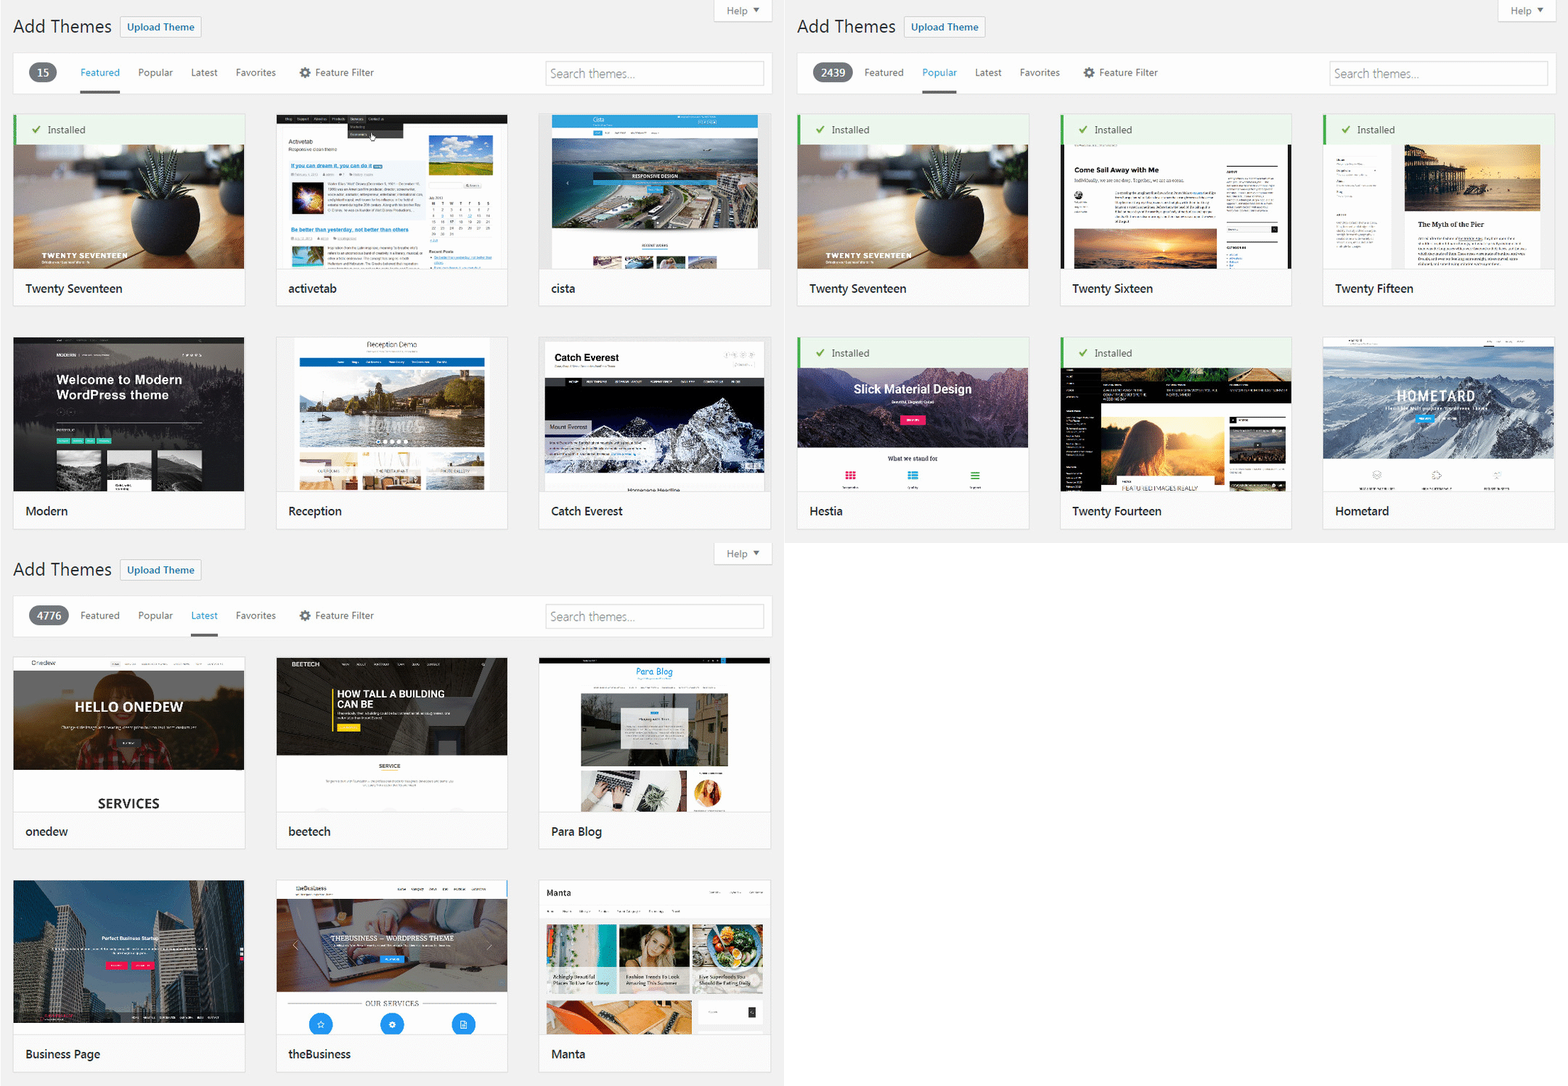
At first glance, you will only see a screenshot and name of each theme.
Once you move the mouse cursor over an item that you like, WordPress will show a few extra options.
By clicking on the “Details & Preview” or the “Preview” button itself, WordPress will open the demo page of that particular item. Here you can also read a description, see rating score, and view a few more details about it.
If you like what you see on the demo page, you can quickly install that theme:
- Click on the “Install” button in the top-left corner of the page
- Wait for a few seconds (or a few minutes, depending on the speed of your Internet connection) for the installation to complete
- Click the “Activate” button to apply changes
WordPress then implements adjustments, and the new theme becomes visible to everyone who loads your site. It also takes you back to the Themes page where you can continue the search or change a theme to any other from the list.
Until you click the “Activate” button, the theme will stay installed on your site, but visitors will still see your old design.
If you decide to switch to the newly installed theme that you haven’t activated yet, please navigate to Appearance -> Themes. Find the item, hover over it and click on “Activate” button to have the new styles applied to your site.
If you don’t need to preview the theme, you can install it immediately by clicking the appropriate button.
Upload a theme through WordPress admin
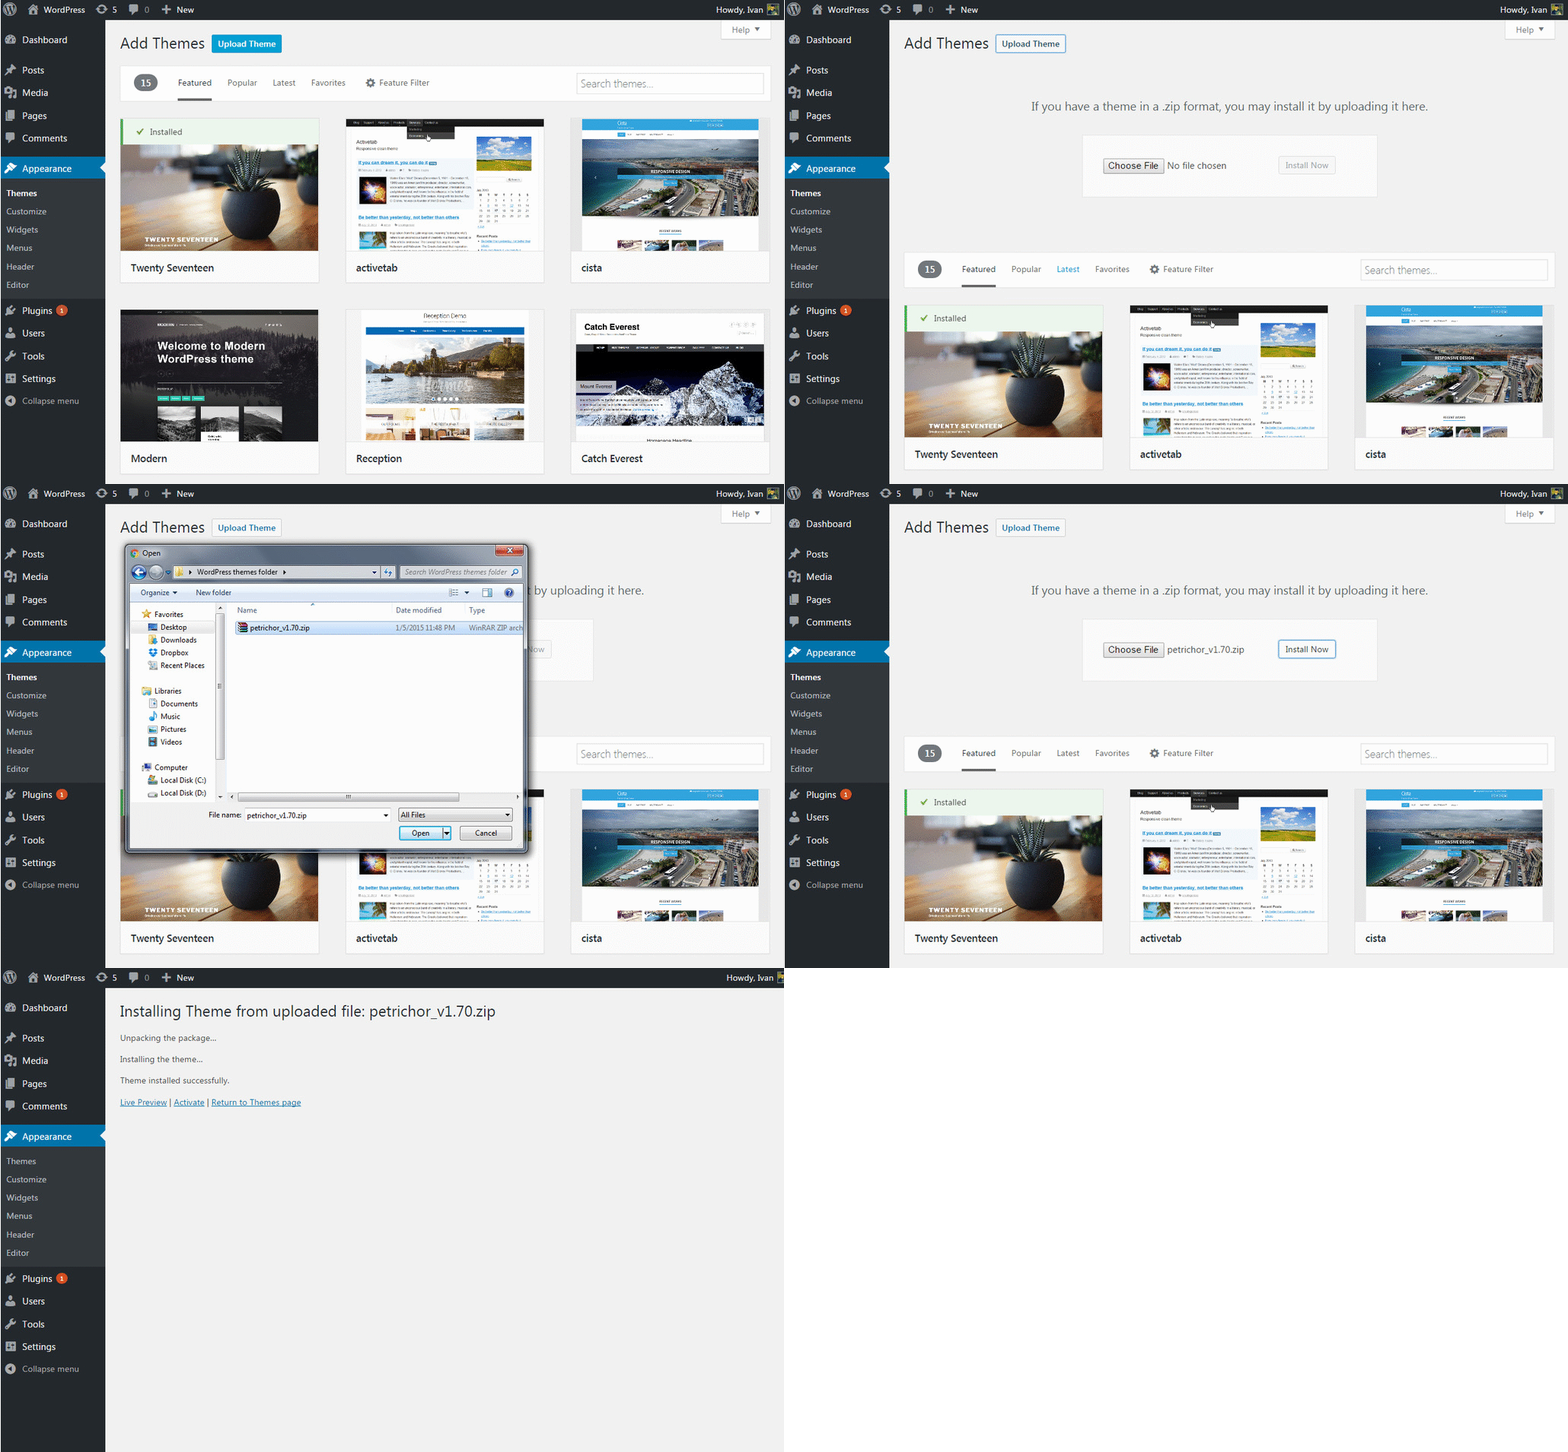
The first method works only with free WordPress themes from the official repository. But if you download a theme directly from the same directory in ZIP format, find one on any other site or purchase a premium item, you will need to upload it manually. It is important that you have the theme in .zip format (don’t extract it as it won’t work that way):
- Go to Appearance -> Themes
- Click “Add New” button
- On top of the page, click “Upload Theme” button
- Click “Choose File”
- Select .zip file from your computer
- Click “Install Now”
- Wait for a few seconds for WordPress to install the theme
On a new page that will open, you should see a confirmation message. From the same page, you can preview the theme you just uploaded, activate it immediately or return to Themes Page.
Upload a theme via FTP
Just in case you don’t have access to the WordPress dashboard at the moment or you couldn’t install the new theme through WordPress admin for any other reason, there is a third method that can help you. This one isn’t entirely beginner-friendly as you will have to know how to work with an FTP client. It also requires FTP credentials which many beginners don’t know where to find and how to use.
But if you received the FTP login information to your inbox, and you’re not entirely strange to File Transfer Protocol and working with files, installing a WordPress theme this way will take just a few moments.
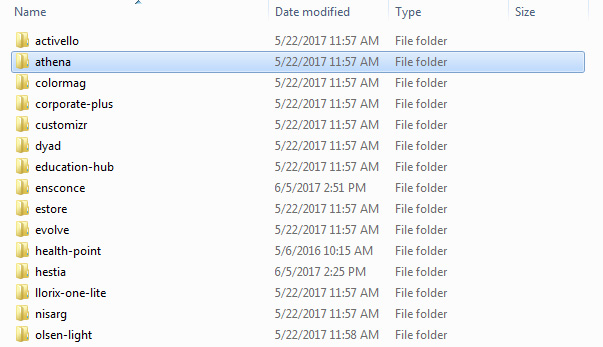
So, instead of going through the user-friendly interface in WordPress like with the previous methods, you can add a theme directly to the themes folder of your WordPress installation:
- Download and install free FileZilla or any other FTP client
- Open the application, and connect to your FTP server
- Navigate to WordPress folder (usually found in “www” or “public_html” folder)
- Open wp-content/themes folder
- Unzip your new theme there (you should end up having one new folder named after the theme)
- Log in to the WordPress admin dashboard
- Open Appearance -> Themes
- Find the new item, bring your cursor over and click the “Activate” button
Conclusion
When you decide to install a new WordPress theme, there are three methods you can use. While themes from the official WordPress directory can be quickly installed through the admin panel, you will have to upload the other ones manually.
Just in case you can’t install a theme through WordPress, use FTP access to transfer the files directly into the folder. As soon as you install a few WordPress themes and try them out, this will become your second nature.

